What is the AWS Systems Manager service?
AWS Systems Manager is an AWS service that can be used to view and control AWS cloud and on-premise infrastructure. By installing and configuring AWS Systems Manager Agent (SSM Agent) on an EC2 instance, an on-premise server, or a virtual machine we can update, manage and configure different software and applications.
Use Case – How to manage a software (un)installation on Windows 10 machine using AWS Systems Manager service.
Step 1 – Create a Hybrid Activation.
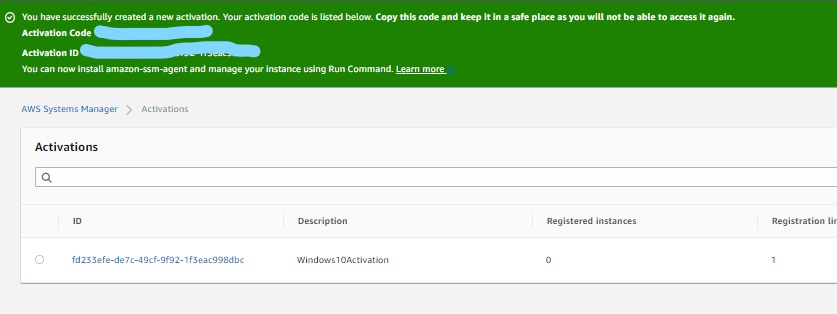
To set up servers and on-premise virtual machines (VMs) in a hybrid environment as managed instances, we need to create a managed-instance activation. After we successfully complete the activation, we immediately receive an Activation Code and Activation ID. We specify this Code/ID combination when we install AWS Systems Manager SSM Agent on servers and VMs. The Activation Code and Activation ID provides secure access to the Systems Manager service from the managed instances.
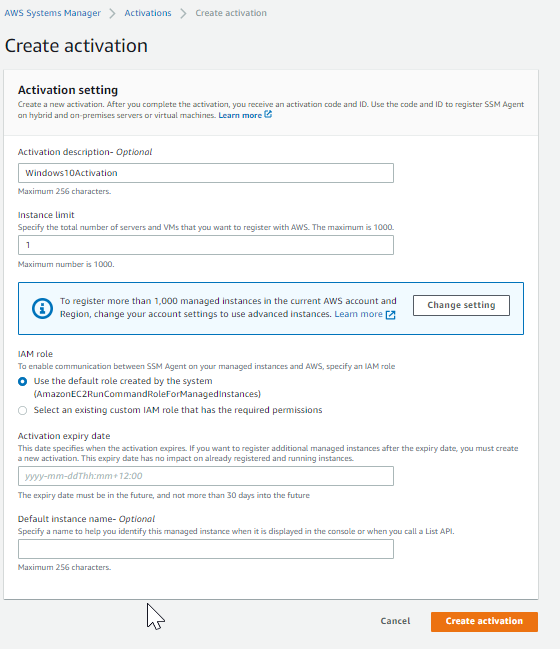
To control and manage on-premise servers or virtual machines, we need to create a managed-instance activation. Login to AWS Console, navigate to AWS SSM service, and to hybrid activation. For this demo, we are keeping the default configuration values.
AWS Console -> AWS SSM Service -> Hybrid Activation -> Create Activation
Save the Activation Code and Activation ID to use later for setting up the SSM agent.
Step 2 – Install SSM on Windows 10 on-premise virtual machine.
Log on to the Windows Virtual Machine, and open Windows PowerShell in elevated (administrator) mode. Copy and Paste the following command block in Windows PowerShell. Replace the placeholder values with the Activation Code and Activation ID generated in step 1, and with the identifier of the AWS Region, we want to download SSM Agent from.
$code = “activation-code”
$id = “activation-id”
$region = “region”
$dir = $env:TEMP + “\ssm”
New-Item -ItemType directory -Path $dir -Force
cd $dir
(New-Object System.Net.WebClient).DownloadFile(“https://amazon-ssm-$region.s3.$region.amazonaws.com/latest/windows_amd64/AmazonSSMAgentSetup.exe”, $dir + “\AmazonSSMAgentSetup.exe”)
Start-Process .\AmazonSSMAgentSetup.exe -ArgumentList @(“/q”, “/log”, “install.log”, “CODE=$code”, “ID=$id”, “REGION=$region”) -Wait
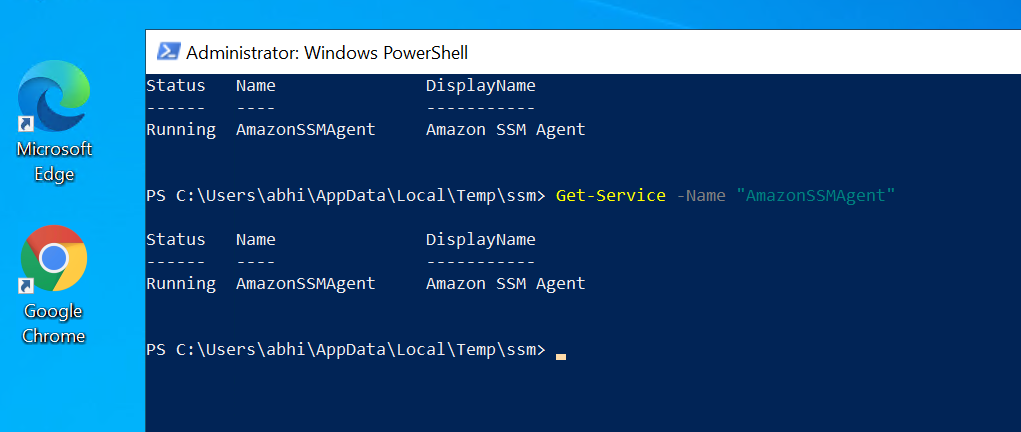
Get-Content ($env:ProgramData + “\Amazon\SSM\InstanceData\registration”)
Get-Service -Name “AmazonSSMAgent”
The command does the following:
- Downloads and installs SSM Agent onto the Windows 10 Virtual Machine.
- Registers the VM with the Systems Manager service.
- Returns a response to the request similar to the following.
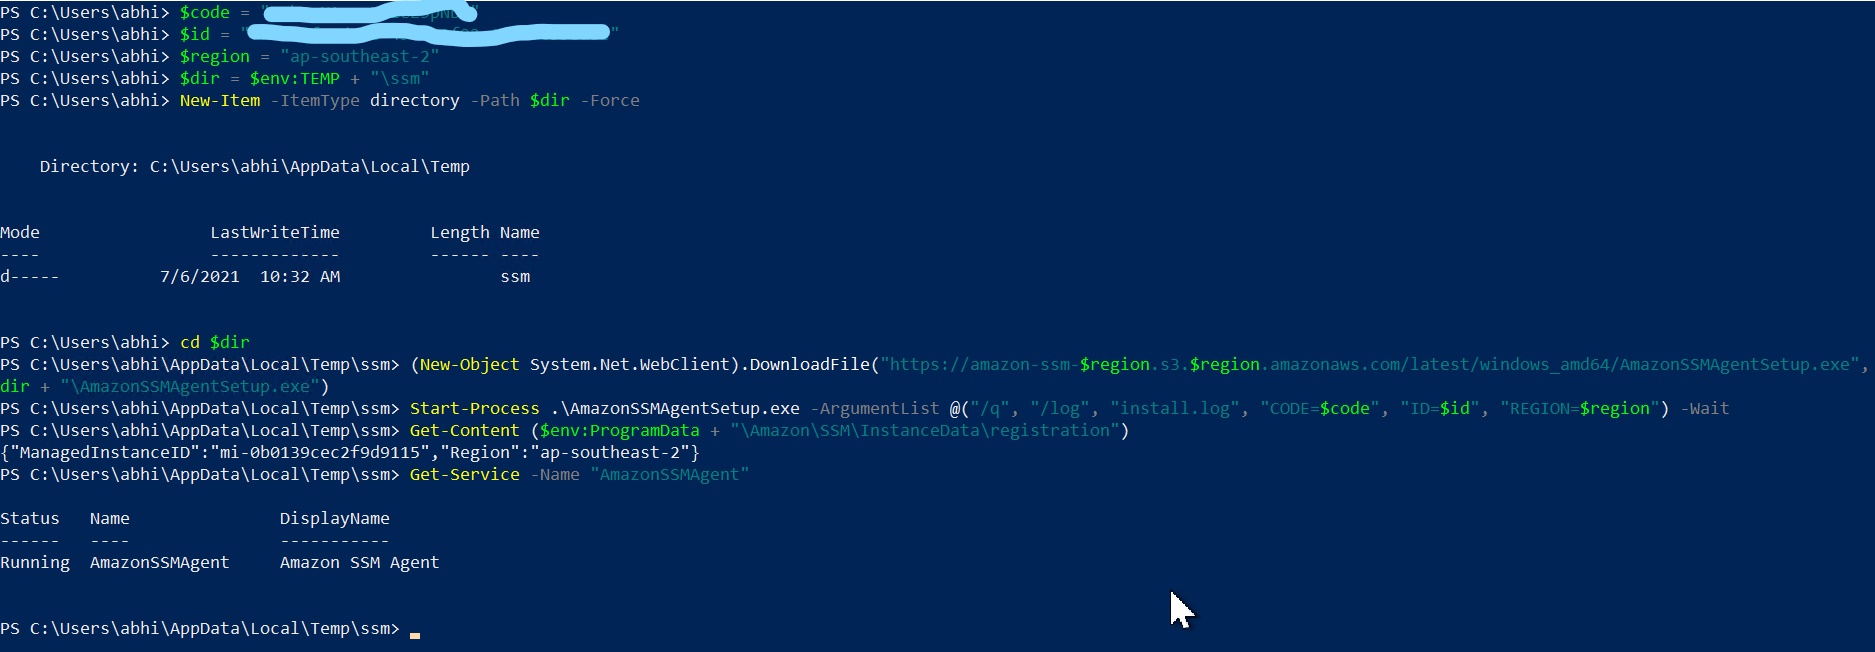
The Windows VM is now a managed instance. This instance is now identified with the prefix “mi-“. We can view managed instances on the Managed Instances page in the Systems Manager console, by using the AWS CLI command.

Step 3 – Create an AWS SSM Distributor Package.
Distributor, a capability of AWS Systems Manager, helps us to package our own software to install on AWS Systems Manager managed instances. Distributor publishes resources, such as software packages, to Systems Manager managed instances.
For this demo, we have packaged our own software, Windows chrome, We can download the package and manifest file from the git repository. You can learn here how to create your own custom package.
To create a distributor package, we need to copy the 1. Zip File (software package) and 2. Manifest.json (metadata) to S3 Bucket giving read permissions to AWS SSM service.
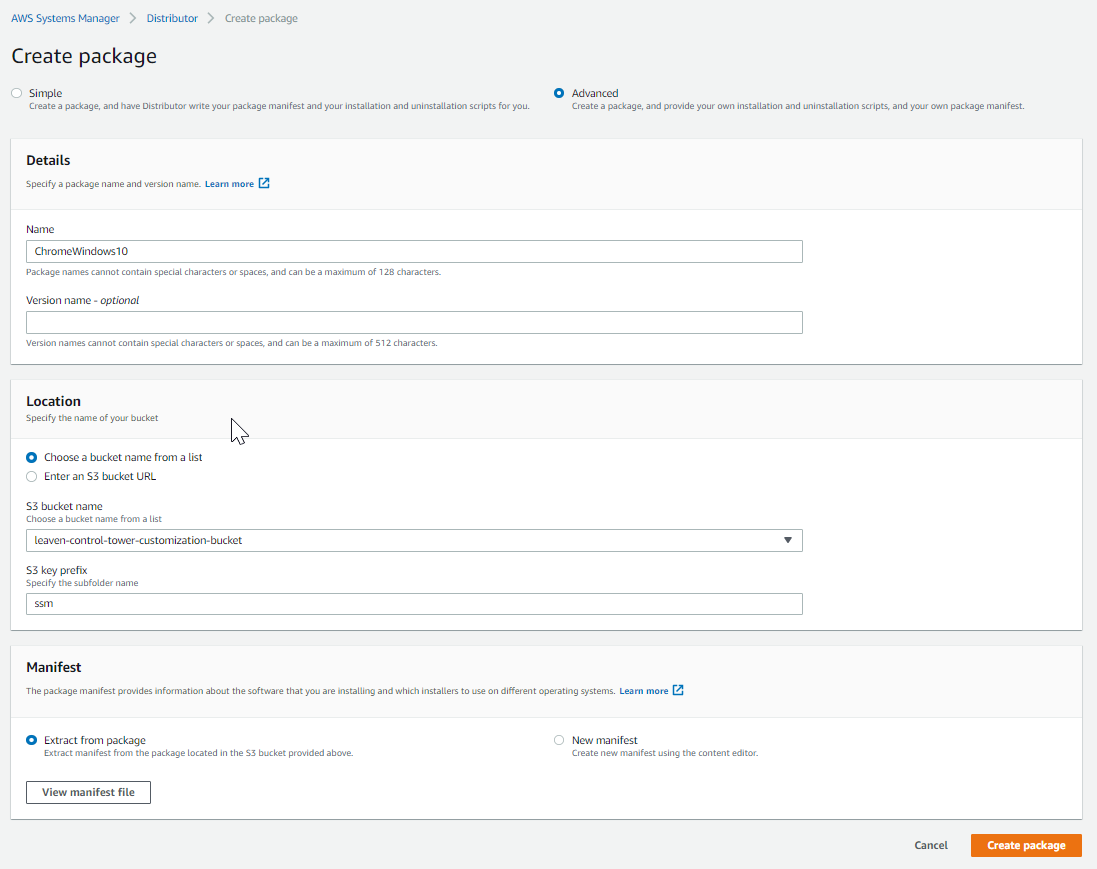
Navigate to AWS SSM service -> Distributor -> Create Package
- As we are providing our own manifest file, install and uninstall script, select the Advanced option (as shown in the image)
- Pick a name for the distributor package.
- Provide the S3 bucket name where we have copied the software package and manifest file.
- Click on “view manifest file”, it will populate the content of our manifest file from the S3 bucket.
- Create a package and wait for package creation.
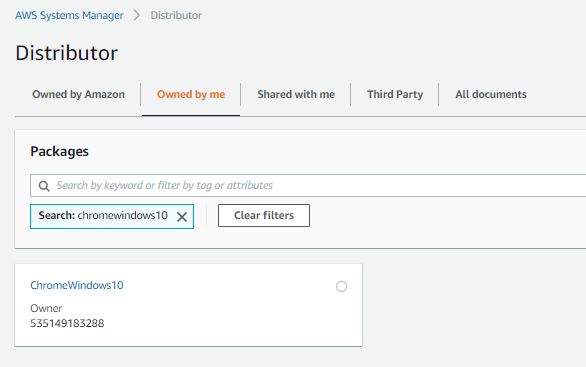
- We can view our package under the AWS SSM Distributor’s “Owned by me” tab.
Step 4 – Install the Distributor package on Windows 10 Virtual Machine.
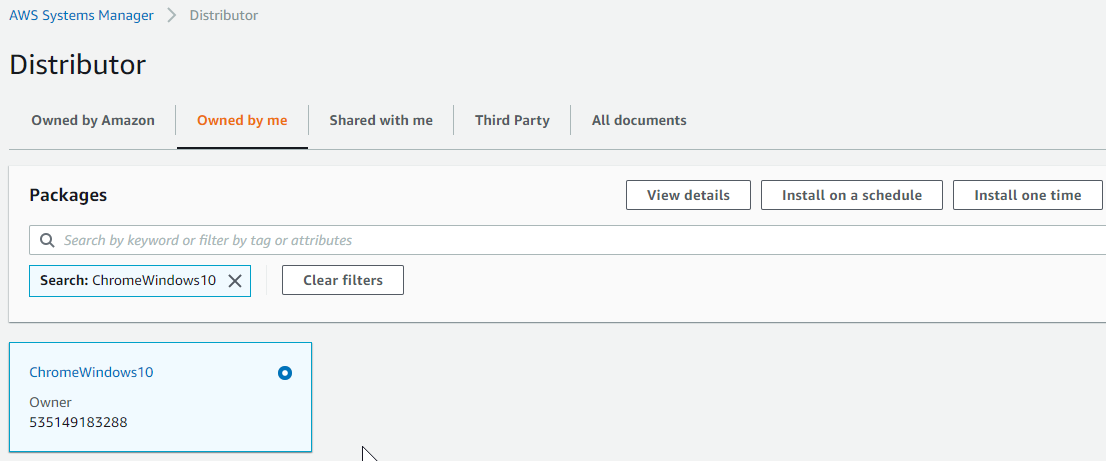
Navigate to AWS SSM service -> Distributor -> Owned by Me
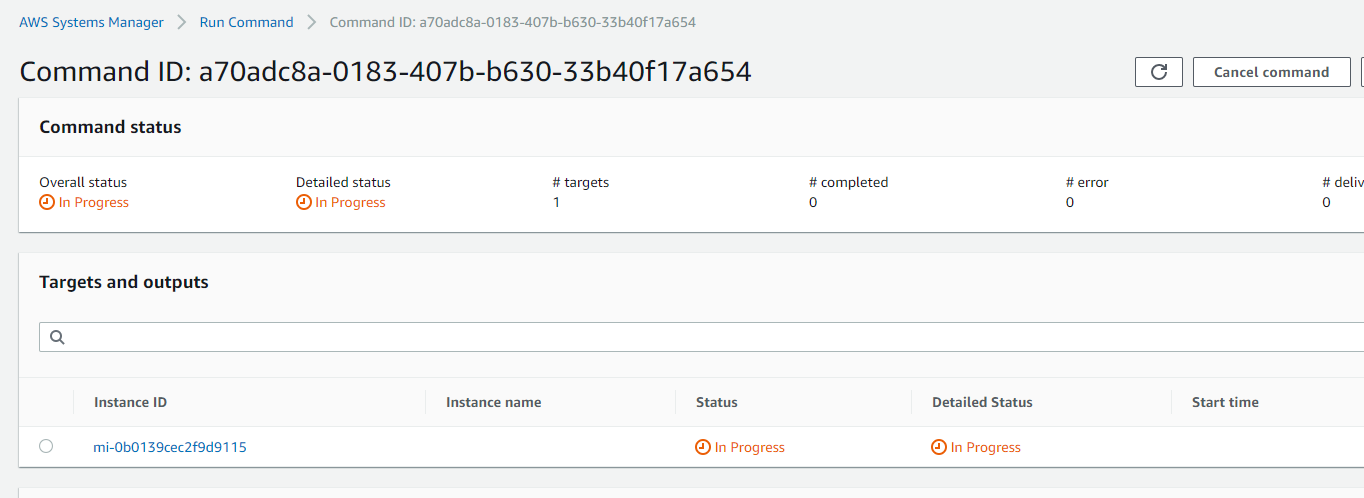
- Select the package we have created in the previous step and click “Install one Time”.
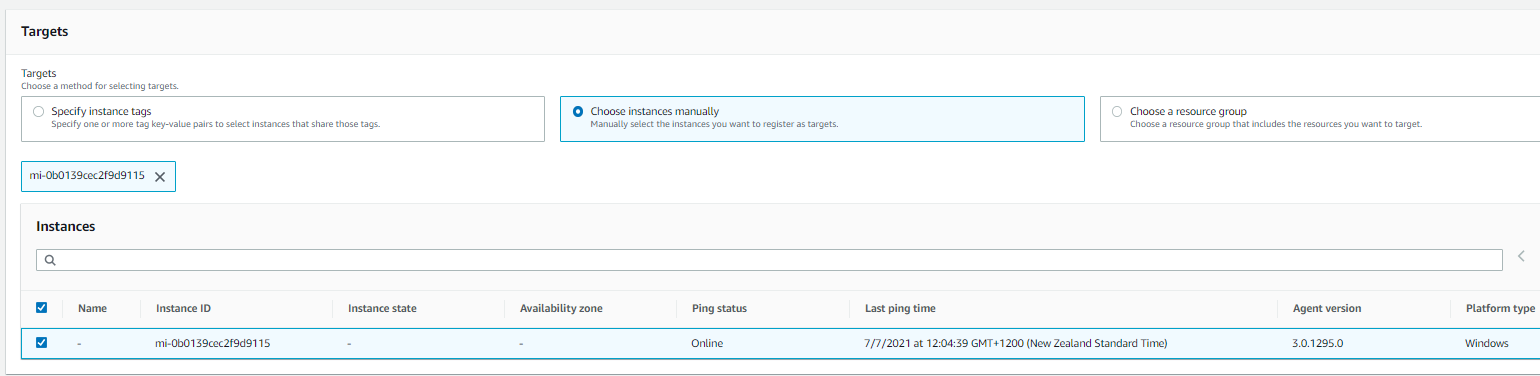
- As we are managing a single instance for our use case, we will pick “Choose Instance Manually”. AWS recommends using tags for managing the fleet of EC2 instances and On-premise Virtual machines.
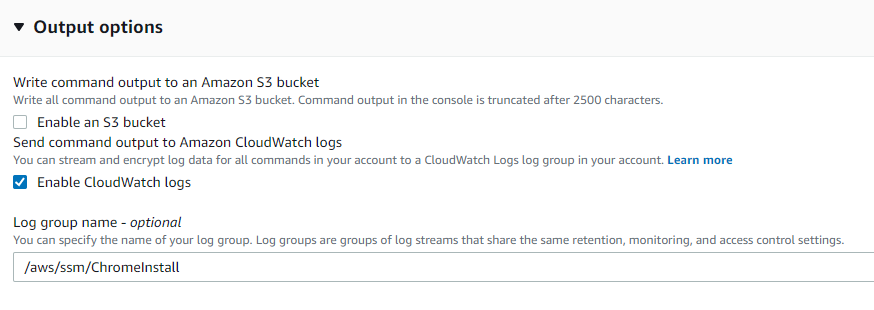
- We have 2 options to log the command output either to S3 Bucket or to Cloudwatch logs. Here we are pushing command output logs to Cloudwtach for near real-time visibility. Press the “Run” command button.
- Wait for the AWS SSM command to execute on our on-premise instance. Google Chrome is installed successfully on our windows 10 machine.
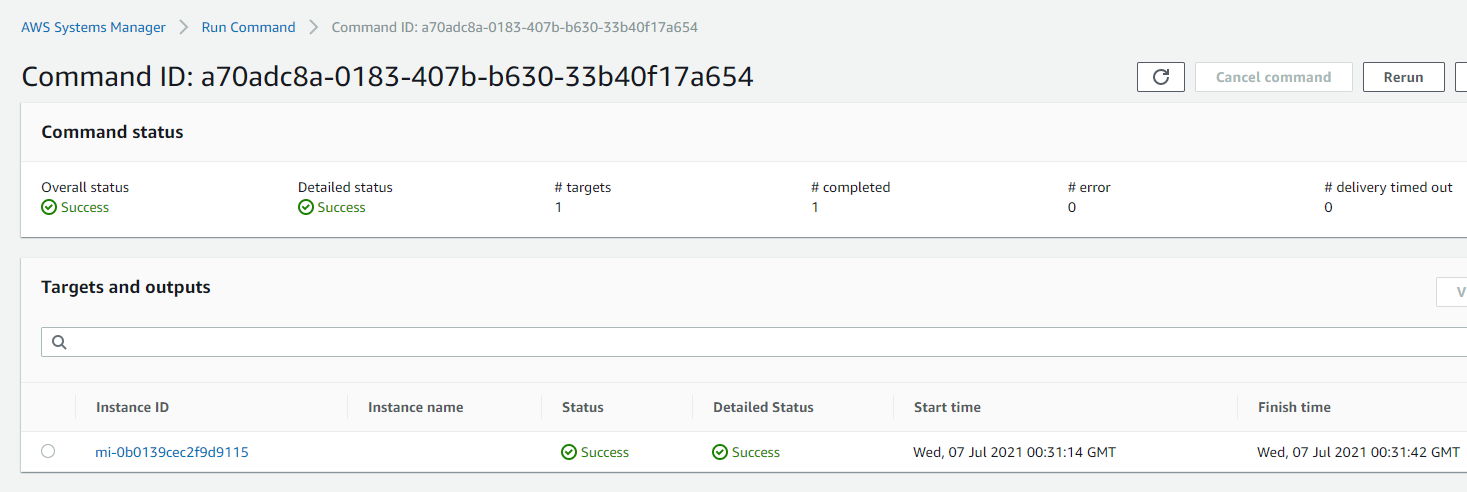
- Log on to the Windows virtual machine and validate if the chrome browser is installed.
- We can view the installation logs in the AWS Cloudwatch log group.

- To Uninstall the chrome package from the windows machine, run the command again, but this time with Command Parameters “Action” as Uninstall. (Run Command will read the uninstall.ps1 script from our Distributor package and take appropriate action.)

Summary
AWS Systems Manager is a powerful tool, with AWS SSM we can manage AWS EC2 instances, on-premise servers, or Virtual machines at scale. AWS SSM Distributor package and Run Command improves operational efficiency and give greater control to manage the software installations on Linux and Windows Operating Systems.
Further utilizing services like AWS Codepipline, CodeCommit, and Code Deploy, we can automate the Software installation and Uninstallation process for a fleet of cloud and on-premise servers.
