Why do we need CodePipeline?
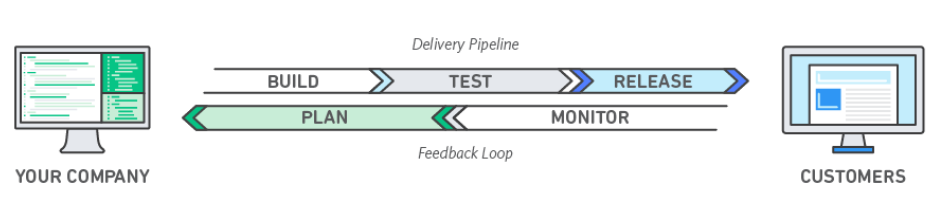
Code deployments are inherently risky, especially when deploying to production or staging environments. The longer the code sits in our environment before being deployed to production the higher the risk of downtime or security incidents due to human error during manual deployments. Codepipeline simplifies continuous delivery by automating our release pipeline so we can deploy with confidence at any cadence without impacting application performance or availability. We can also use it for other tasks such as package management and infrastructure configuration management that are crucial parts of every software development lifecycle (SDLC).
Solution
In this article, we are deploying a hello world web application to an EC2 instance using the AWS Code pipeline. Codepipeline will have 3 different stages Source, Build(Test) and Deploy. For this solution we picked
- Source – AWS Code Commit Repository,
- Build – Code Build for a test stage, and
- Deploy – Code Deploy to deploy the tested code to the EC2 instance.
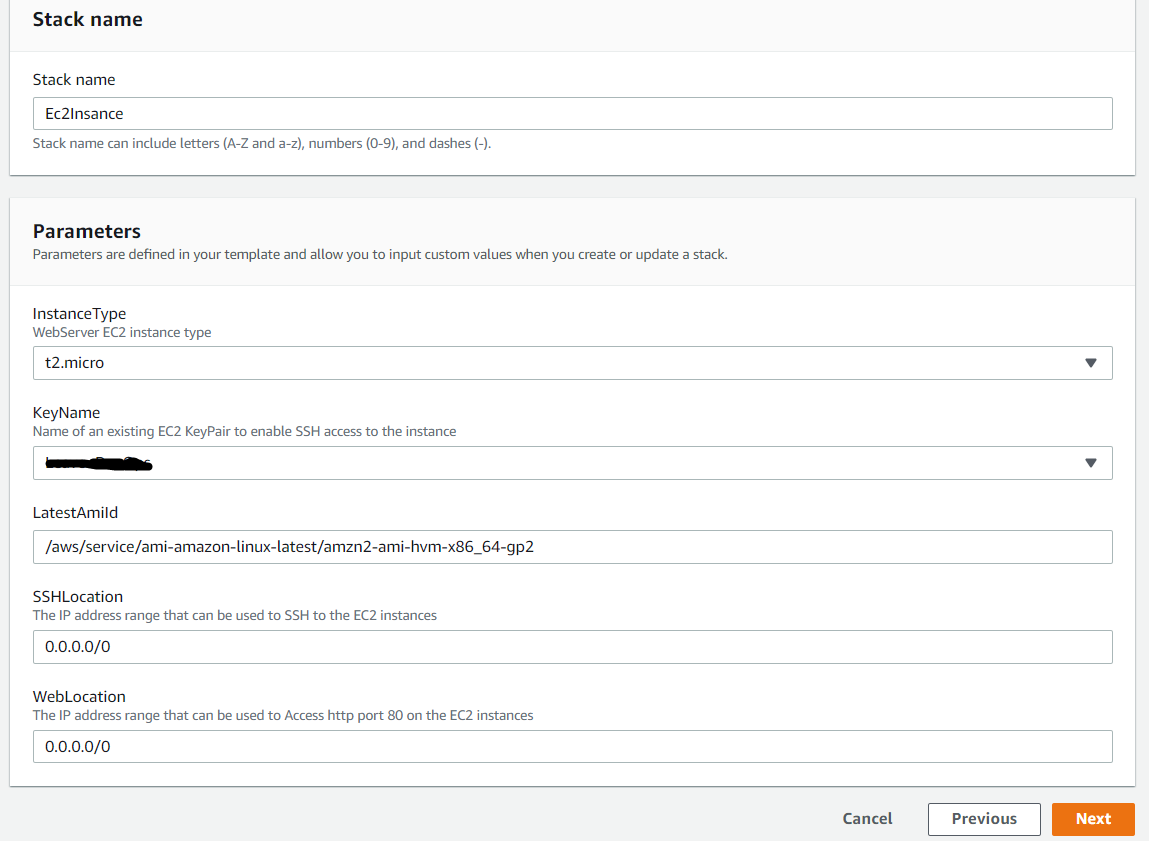
Step 1: Launch an EC2 instance.
To keep things simple and easy, we are using the power of the CloudFormation template to launch an EC2 instance with an associated IAM role, deploying a Codedeploy agent with the help of the CloudFormation Userdata feature. We need an IAM role because code deployment will tell the EC2 instance to fetch the code and artifacts from S3. IAM policy should be to get and list items from S3.
Another important configuration in our Clodformation template is the instance tagging because a Codedeploy manages instances based on the tags. A deployment group in Codedeploy configuration contains individually tagged instances, Amazon EC2 instances in Amazon EC2 Auto Scaling groups, or both.
To deploy the EC2 instance, navigate to the Amazon Management portal -> CloudFormation service -> create a new CloudFormation stack.
Template link – Ec2 Instance CloudFormation Template
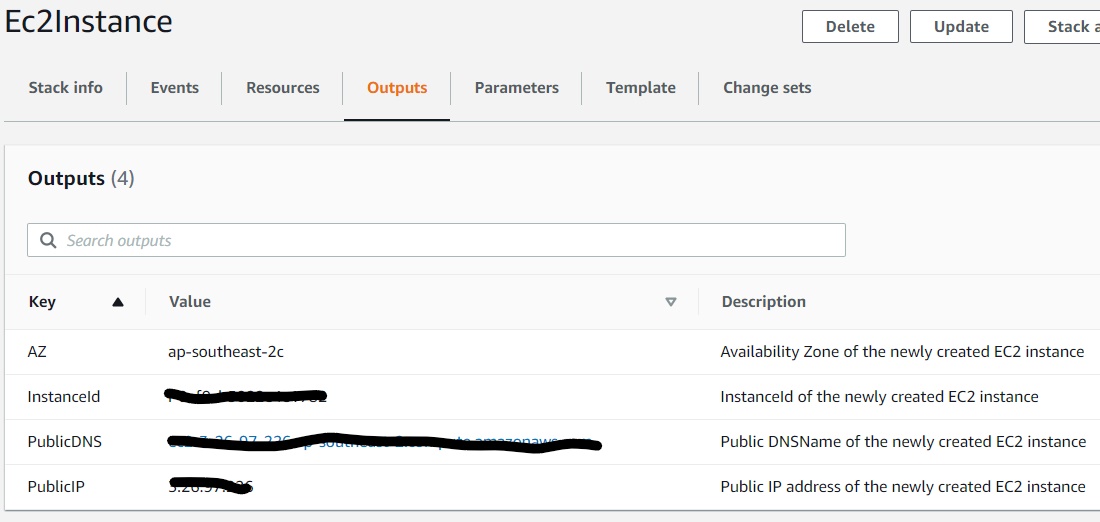
Make a note of the Public IP of the Ec2 instance from the CloudFormation stack Outputs tab.
Step 2: Launch an AWS Code pipeline.
This solution uses the AWS suite of CI/CD services to compile, build, and install a version-controlled Web application onto an Amazon Elastic Compute Cloud (Amazon EC2) Linux instance via a fully automated and secure pipeline. The goal is to promote a code commit or change to pass through various automated stage gates all the way from development to production environments.
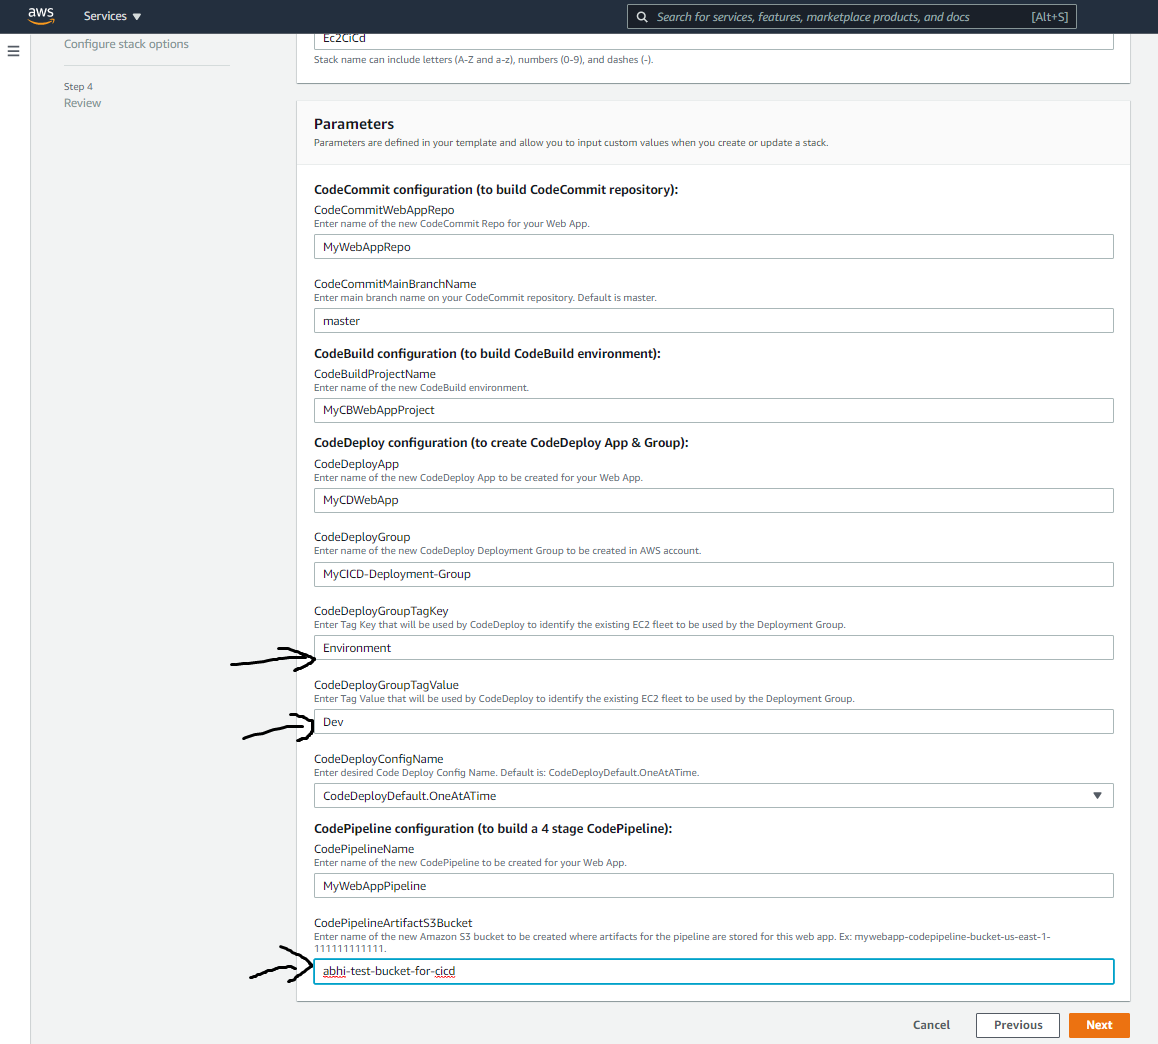
The solution creates
- A Code Commit repository to host the web application code.
- A Cloudwatch event rule to notify and run the Code Pipeline.
- A Code Build Project to run a simple test.
- A Code Deploy Application, and Group to deploy the code on tagged instances.
- A Code Pipeline to automate the build, test, and deploy phases of our release process every time there is a code change.
- A CMK KMS key and encrypted S3 bucket to store the code Artifacts securely.
- IAM roles for each component of CI/CD service.
To deploy the complete CI/CD stack, navigate to the Amazon Management portal -> CloudFormation service -> create a new CloudFomration stack. Match the CodeDeployGroupTagKey and CodeDeployGroupTagValue, with the tag key/value of the ec2 instance. Provide an S3 bucket name for the CodePipeline artifacts store.
Template link for CI/CD services suit.
Step 3: Upload the Application Code to the Code Commit Repository.
To push the application code, available here, to the AWS Code Commit repository. I cloned the repository to my local workstation, copied the application code, and pushed the code back to the Code Commit repository.
To get the repository URL navigate to AWS management Console -> Code Commit Service -> MyWebAppRepo -> Clone URL
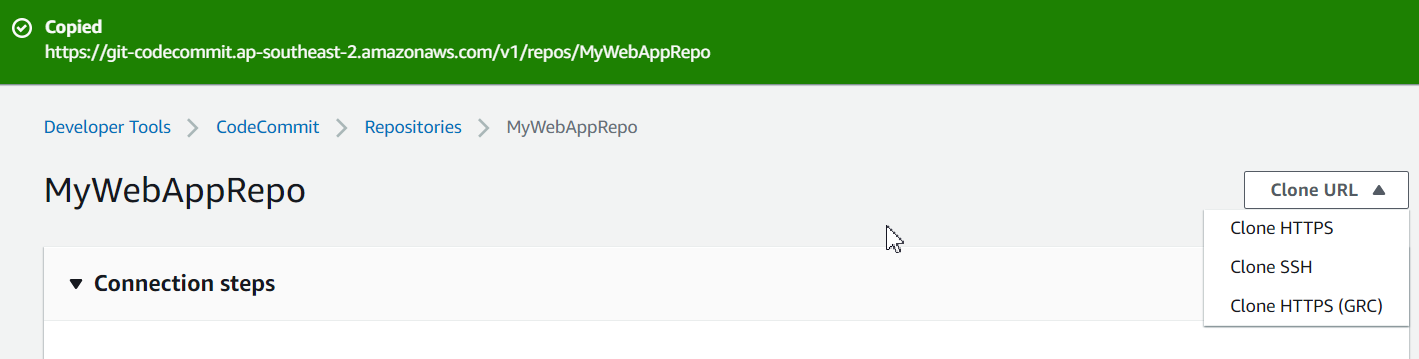
Clone the empty repository, Change it into the MyWebAppRepo directory. Copy the code into the directory.
git clone https://git-codecommit.ap-southeast-2.amazonaws.com/v1/repos/MyWebAppRepo

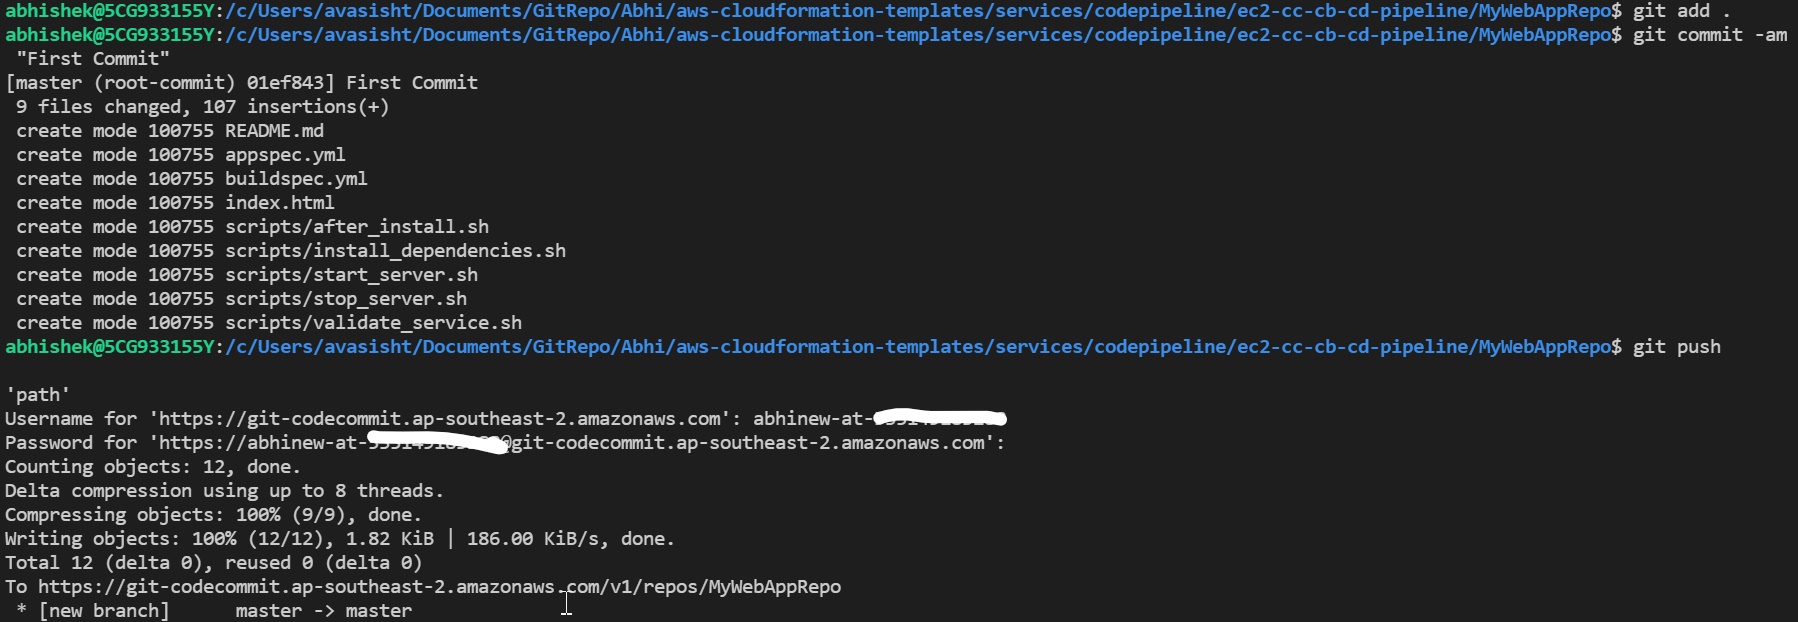
Add all the files using git commands
git add .
git commit -am “First Commit”
git push
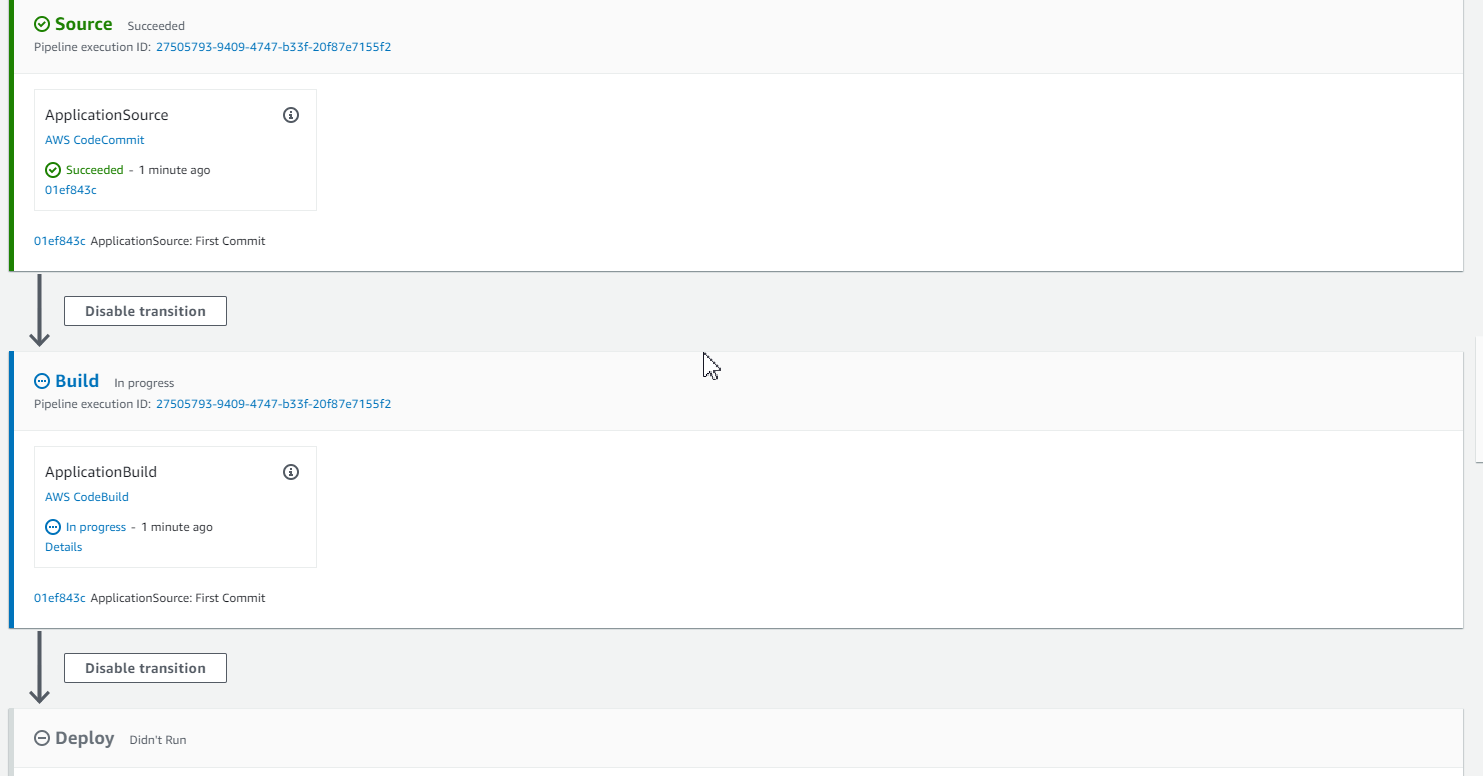
As soon as we push the code to the AWS Code Commit repository, The changes will be picked by the AWS CloudWatch event and in return, it will trigger the AWS Code Pipeline. We can check the logs and history by navigating to AWS management console -> AWS CodePipeline service.
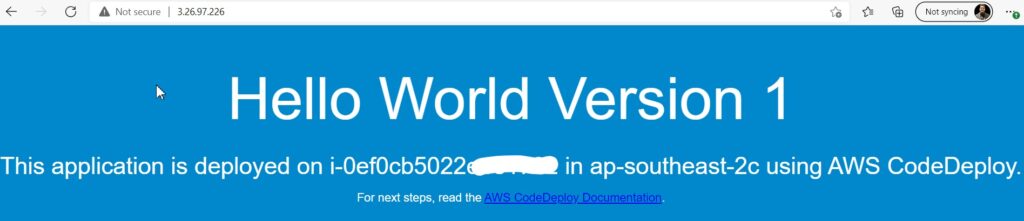
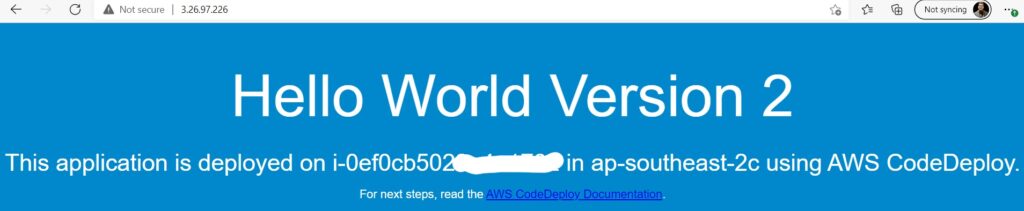
Woohoo… Now our code has been successfully deployed to the EC2 instance. Paste the IP address of the EC2 Instance (from the CloudFormation outputs in step 1) to the browser.
Step 4: Validate the CI/CD pipeline flow.
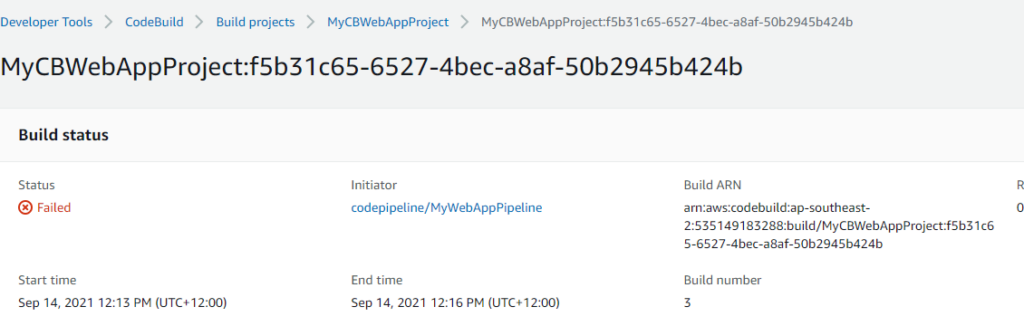
- To validate if the pipeline is working as expected, make a change to the index.html file from the console and the web page should show up with new content.
- To validate the anti-pattern, break the pipeline, replace the “Hello” word from the index.html file with something else.

Step 5: Cleanup the Solution.
To clean up the entire solution, delete both the CloudFormation stacks.
- EC2 instance CloudFormation Stack.
- Empty the S3 bucket before deleting the CI/CD Pipeline stack.
Conclusion
AWS CodePipeline is a pipeline-as-code service that lets us automate our tasks and workflows. AWS CodePipeline also works with AWS CodeBuild so that we can build and test code for AWS resources without having to provision servers or virtual machines. AWS CodePipeline is designed to be used with other AWS services so that we can automate AWS resources provisioning, security, and compliance checks.
Let’s start Automating. 🙂
